
Welcome back, digital trailblazers! At Whitehat, we always look for innovative ways to supercharge your content strategy. Today, we're dusting off one of our classic blog posts and giving it a 21st-century makeover. But here's the twist – we're leveraging the power of AI to help us craft this update. Using an AI template as our starting point, we're not just saving time; we're tapping into cutting-edge technology to ensure our content remains fresh, relevant, and valuable.
Don't worry—we're still infusing it with that human touch that makes Whitehat's insights uniquely actionable. So buckle up as we embark on an AI-assisted journey to revamp our content and boost your digital marketing game!
We’re here to walk you through a hands-on workshop for creating pages in the CMS Hub. We'll first explain the new CMS hub and then cover how Themes and drag-and-drop Page Editing work in more detail.
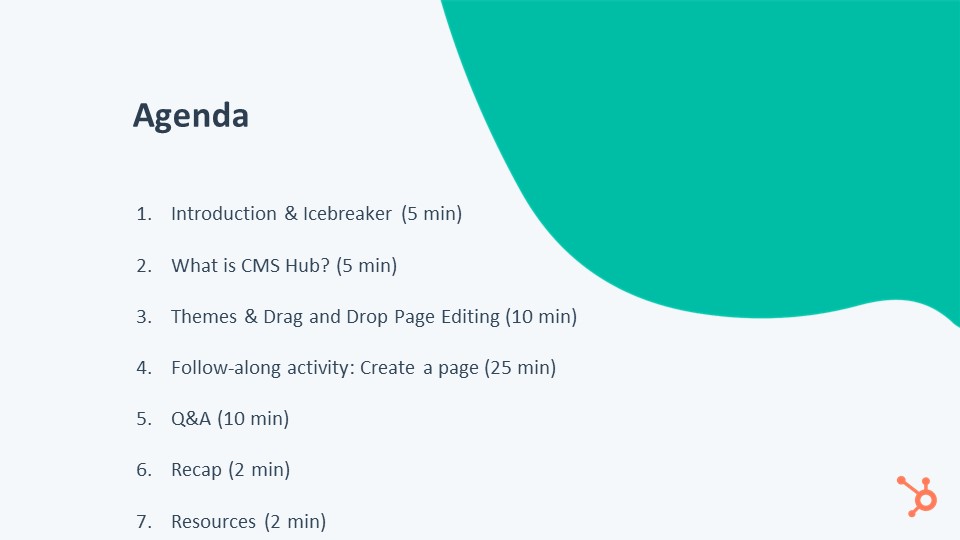
Once we've covered those, we'll dive into our activity, following up with creating a page in your sandbox account. You can use a CMS account. You can use a sandbox environment or watch, follow along, take notes, and do whatever you want. We'll have some time at the end for Q&A, a quick recap and some further resources so you can continue learning.
- HubSpot Academy
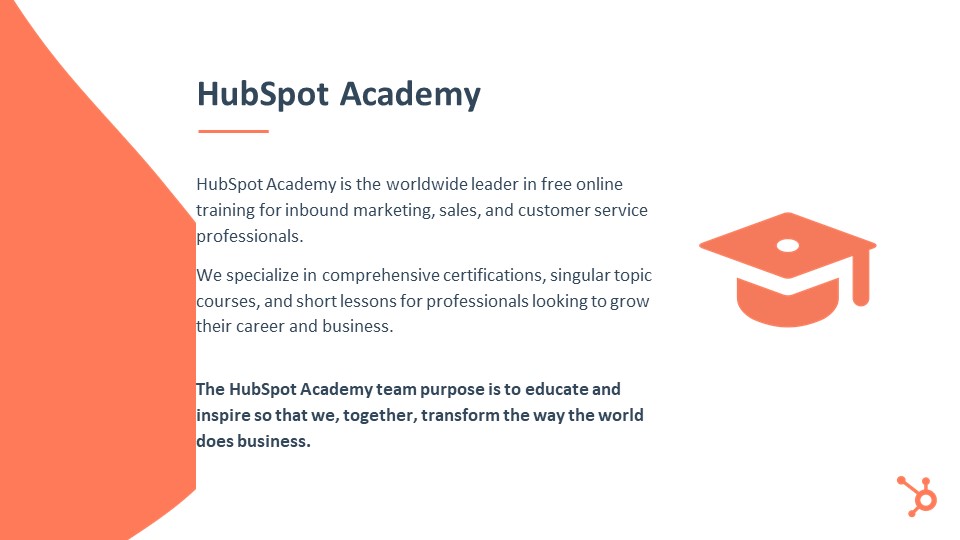
Here is some background on the HubSpot Academy: For those who might not be familiar with us, HubSpot Academy is the worldwide leader in free online training for inbound marketing, sales, and customer service. We specialise in certifications, courses and lessons for people looking to grow their business or career. Our purpose – why we exist as a team – is to educate and inspire so that we can transform how the world does business together.
As we mentioned, you must access a CMS Hub account to complete this activity. When you click “Create an Account”, you can continue with your existing HubSpot login. It will create a new sandbox instance of that CMS portal with your existing login credentials. It’s easy and quick, but the sandbox is separate from your regular HubSpot portal.
You can mess around and do whatever you want, and it won't affect your live HubSpot data. If you don't have a HubSpot account yet, or if you want to separate the two, or if you're going to use your email for some reason, you can click the “Create account with a new user” button and create an entirely new profile.
- What is CMS Hub?
Let's dive into what we're here to talk about today: HubSpot's new CMS Hub. We'll go through this quickly, but let's take a step back and discuss your website. Your website is your business’s home on the web. It's your most important digital asset. It's the first place people will go to learn about you, your business, your products, your services.
It is really your address on the internet. In HubSpot’s study that we did late last year, we found that a business website is the most used distribution channel for marketers. In the same study, we found that 63% of marketers are investing in some sort of website upgrade in 2020.
There's something that they want to change about their site, whether that's a complete site redesign, a migration to a new CMS, adding in more SEO or lead generation functionality, including more advanced security protocols, some sort of website upgrade this year. That's what the vast majority of marketers are saying, which is really interesting.
A lot of those upgrades actually come with a lot of pain. As companies grow, they're forced to spend more time managing their systems and focusing on their customers. They spend a lot of time updating plug-ins, working through complicated workflows, and trying to get a developer or IT resources to fix simple things on their site. They spend so much energy and time on those aspects rather than focusing on what's truly important, which is the customer experience.
This is where HubSpot CMS Hub was born: this idea of less pain, more gain. We want you to spend more time focusing your energy on creating an incredible customer experience and delighting your customers throughout the buyer's journey and less time bogged down in system management.
The HubSpot CMS help is positioned nicely between Legacy Enterprise CMSes, which are super powerful for developers but don't give much control to the marketer, and simple web page builders, which are very powerful for marketers.
They give users a lot of control but don't offer the flexibility to integrate marketing efforts or more advanced features that the HubSpot CMS Hub offers.
We'll just quickly cover the two tiers of CMS Hub. There's CMS Hub Professional which is, if you've been previously with HubSpot and used RCMS, is sort of what we had before but repackaged and very much upgraded. And then there's the CMS Hub Enterprise, which has everything from Professional, but allows you to build really powerful web experiences, have control and governance at scale over your brand, and a lot of really awesome features for more growing teams.

Here's a quick breakdown of all the features in CMS Hub. You can see these on the product page. If you just Google HubSpot CMS Hub, these will all come up with a lot more detail. Today we're going to focus specifically on Drag and Drop Page Editing and Themes. These are two of the coolest new features of the CMS Hub and it really revolutionised the way that marketers can create content in the CMS. That's what we're going to dive into a little bit and start using today.
- Themes and Drag and Drop Page Editing
What are Themes and Drag and Drop Page Editing?
- Themes: Themes do two things primarily. They allow developers to create a site-wide content editing experience that puts the marketer in control over their website. They also allow marketers to make changes to their website without needing a developer for maintenance or knowing HTML or CSS.
A theme is essentially a collection of assets designed to work together. It contains a set of templates, all with the same branding. They've got the same look and feel, and they're designed to create a cohesive website experience.
Templates are files that control the layout and functionality of your page. They are a starting point for building a page, but they're fully customisable with the drag-and-drop page Editing feature, which we'll discuss in a bit. Pages are the finished product that you fill with your content and publish for the world to see.
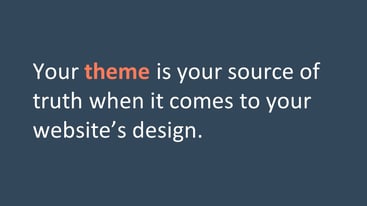
One really important thing to know about themes is that they are your source of truth when it comes to your website's design.
Your theme controls the overarching design and branding of your entire website, and it helps you create a consistent experience that, in turn, creates a really positive user experience for the end user.
Your theme is your source of truth. It is where you should go when deciding on or changing the style of your website.
The way you will make these changes is in your theme settings. Every theme has these controls, these knobs and dials, that allow you to make really quick and easy styling changes to your entire site. When you publish these changes, it will publish to all the assets within the theme to maintain that consistency. It's sort of a one-click publish; it’s super simple and really easy to make changes at scale.
There's a few different types of themes you can get in CMS Hub. You can get a theme custom built by a developer either on your own team or working with a solutions partner. There are premade HubSpot themes included by default in all CMS Hub portals. That's what we're going to work with today, one of those premade themes.
They're really great and sort of customised for different types of businesses, and they're all fully customisable. There are a couple more options: you can download themes from the asset marketplace or if you have your website migrated from another CMS by HubSpot, we'll create a custom theme to suit your website.
- Drag and Drop Page Editing: It allows you to easily design, create pages without any knowledge of HTML and CSS. We're going to dive into this a lot when we get to the workshop portion, but there's a quick little GIF to show you how it works.
- Templates
Another important thing to know when we were creating content in the CMS is that every page in the CMS is created using a template. It’s really important to keep that in mind cause it's sort of fundamental to understanding how the system works as a whole.
The type of template that you choose will determine the type of content that you can create using that template. Templates are suited for different types of content. We have page templates for website and landing pages. There are blog templates for your blog posts and blog listing pages, and then there are system templates.
Some templates are for your standard site pages, like your error pages or your password page. These are a little bit of a different type of template than page and blog. We’re not going to cover these in this workshop, but there's a link in the resources if you want to learn more.
The relationship between templates and pages isn't one-to-one. It's actually one-to-many. You can use the same template to create dozens or even hundreds of different pages.
- Modules
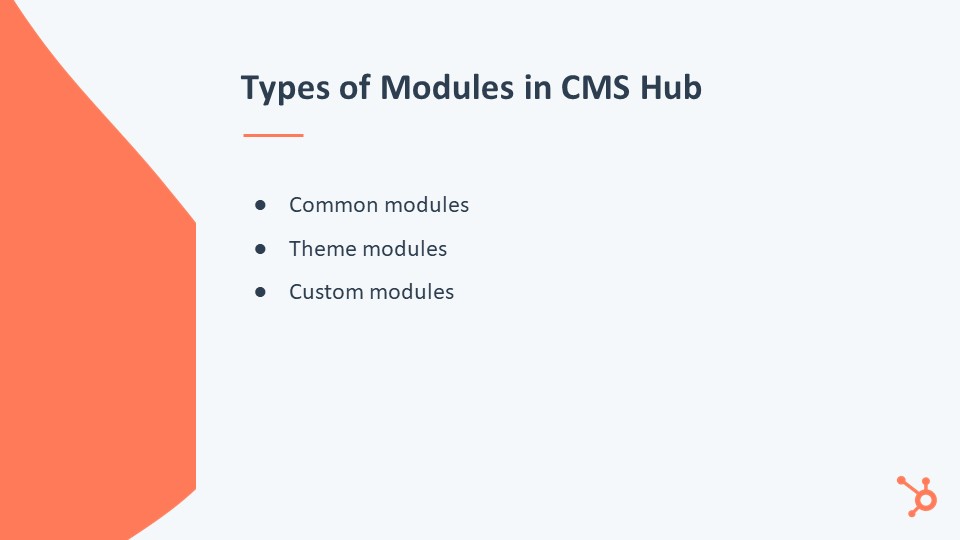
There are also modules, which are the building blocks of templates. In the CMS there are three main types of modules:
- There are common modules, which are the standard elements that you’d expect to see on a website, like a text box or an image or a form. These are all included by default in the CMS.
- Then there's theme modules, which are modules designed to fit specifically with your theme. For example, if you have a fitness studio theme, you may have a theme module that's a class listing and this comes packaged with the theme and is designed to work with that theme. We'll see those when we get into the workshop today.
- The last type of module are custom modules. These are modules that are custom-coded by a CMS developer. There's ton of flexibility with custom modules and you can really do almost anything; the sky's the limit if you have the development resources.

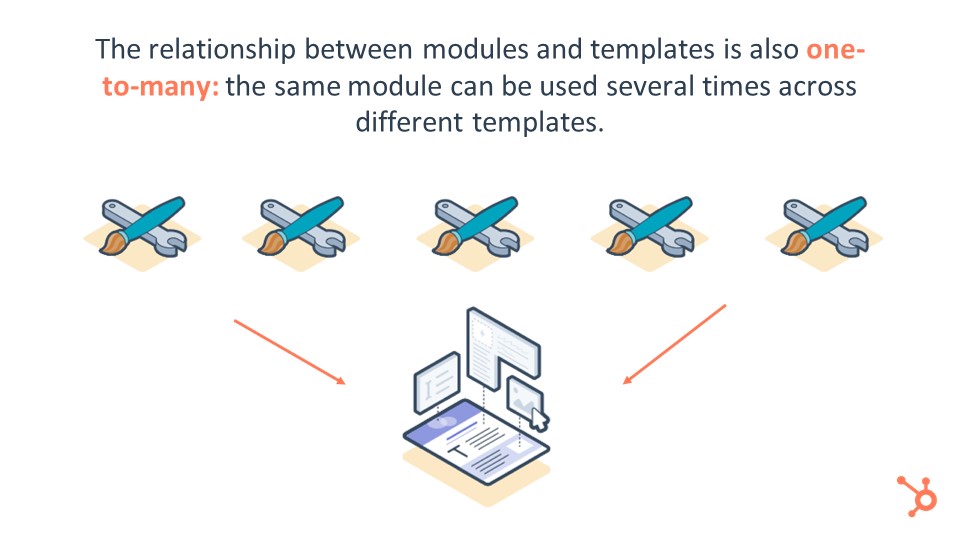
One more thing about modules is that the relationship between modules and templates, similar to the relationship between templates and pages, is one-to-many. You can use the same module many times across different templates and, in turn, across different pages.
- Global Content
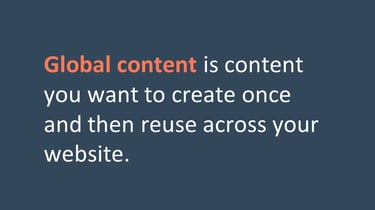
The last thing we're going to talk about when it comes to creating content in the CMS before we actually get started is global content. Global content is content that you want to create once and then we use multiple times across your website.
A great example of global content is your website's header and footer. You want to create these elements once, get them looking nice, and then use them in the same exact way across your whole website to create consistency and a great user experience.
 If you had to create that header again and again for every page, that would be kind of a pain. With global content, you just create it once, and then it's included in the same exact way across your entire site.
In CMS, you can edit your global content right from the page editor. Here, we’re editing the page header of our website page, and when you publish those changes, they will propagate across your entire site.
If your website has 150 pages and you change your logo in your header, it will change across all 150 pages. This is a really quick and easy way to create global changes across your site's content.
- Follow-along Activity: Create a Page
Now that we've covered all the basics of CMS Hub and seen how it works, the best way to learn is to dive in and start using it yourself. Our activity is going to be to create our first page in CMS Hub.
You can use your developer sandbox account to get free access to the entire suite of CMS tools for enough time to play around with all these tools. We're going to do this activity together, and we'll be showing you on screen what we’re doing so you can follow along in your own account or if you want to go off and explore the tools on your own, feel free. It's completely up to yo
Here are the steps that we'll follow: the first thing we'll do is log into our account, go to the website pages dashboard, and create a new website page or landing page. We'll then pick a theme from one of the prebuilt HubSpot themes and select a template from that theme.
Then, we'll customise the theme settings, specifically the colours and fonts, and we'll show you some more options in there, too. We'll work on how to rearrange the page layout using the Drag-and-Drop Page Editor, add content to the page and some styling, and preview the page on mobile devices. We’ll then show you how to grab the page preview link.
- Navigate to Marketing > Website.
The first step is to head to our website pages dashboard. Click on marketing in the main menu.
- Create a new website page or landing page.
Hover over Website and select Website Pages. You can select Landing Pages or Blog as well. It will take you to a different tab within your whole website dashboard. It's broken out by these three buckets to help you maintain organisation in your CMS, but let's start with Website Pages today.
As you can see, we've already done a couple of tests. To create a new page, head up into the upper right corner, click Create and click Website Page.
- Select a theme.
Here you'll see the options for the different themes. If you click on HubSpot themes in the left sidebar, these are all the prebuilt HubSpot themes that come included with the CMS. Even though some of these are more geared towards different industries, we’re going to show you that they can be customised for really any industry. We’re going to pick this Barricade theme, which is more of a manufacturing automotive type theme, but we’re actually going to customize it for my website, our fake company which is going to be The Green Thumb. It's an online plant nursery.
- Select a template and give your page a name.
When you select your theme, you'll be taken to the next screen which is the template options within that theme. You'll see there's a few different options here. We've got Home page, a nice landing page template, and about page template, a blank one that you can use for anything you want. We want to create a home page for our site, so we’re going to select Home.
Then, give your page a name. This is just an internal name purely for organisational purposes. This will never be public-facing to your visitors. We’ll call this “London HUG webinars page” and click Create.
(If you're going to be using HubSpot for blog management, you can get CMS Professional, which includes blog and the rest of the website. If you're only using HubSpot for your blog, you can also use Marketing Hub Professional. That includes a blogging tool, but it doesn't include the rest of your website. If you have your website hosted elsewhere and you're not planning to move it over to HubSpot, you can just host your blog through Marketing Hub Professional.)
Now, we're taken into the page editor. As you can see, it's trying to get us to add a page title. We're going to skip that for right now and take a quick overview of the different parts of the editor.
In the left sidebar, you'll see three tabs. In the Add tab, you have your different module options that you can add into your page, just by dragging them in, which we'll show in a little bit. As you can see, we've got some theme modules that are designed for this particular theme, and our regular common modules.
Next, in the Contents tab, you just have an overview of all of the modules on your page in the order they appear. Finally, the Design tab is where you see your theme and you can edit your theme settings, which is where we're going to head next. We'll just give a quick overview of the other parts of the editor before we do that.
Right now we're in the content portion. If you look in the top menu bar, the Contents tab shows the contents of your page. If you go over to the Settings tab, you'll see the different settings such as your title, your domain, meta description, etc. Next is the Optimize tab and this is where you can optimise your page for SEO. There's a bunch of different recommendations in here. Obviously we haven't added any content yet, so these aren't checked off, but when you complete one of these optimisations, you get a little green check mark. Finally there's the Schedule tab, which is where you can publish your page or schedule it for later.
- Customise your theme settings (colours and fonts).
Let's hop back to the contents tab, click on Design in the left sidebar, and then click on Edit theme settings. This will open up your theme preview or theme editor. In the centre, you'll see a preview of the theme you're working with.
You can toggle between the different templates in the theme up top, with the dropdown menu next to View on. If we want to see how our theme will appear on the About Page, we can switch over to that. As you make changes, they will propagate across all of these templates. Let’s hop back to the Home page since that's the one we’re going to be working on today.
We want to change the colours first. This orange is not really working for our plant website, so under the Colors dropdown menu, let’s click on that. We’re going to change our primary colour to this nice green – now that looks a lot better. We’ll change our secondary colour to a dark grey, and then for the body background colour, we want this to be sort of a fun whimsical website, so we want to make this a nice light pink.
As you can see, if you scroll down the previewer, all these changes are being automatically applied. I'm liking how those colours are looking, but we’re not really liking this font. It's bit too bold, too graphic, and we want to change that to something a little bit more in our company's branding.
Under the Fonts dropdown, click on the little arrow to open that up. We’re going to change the primary font to Open Sans – this is a Google font. We’ll change the weight to Light.
Next, we’ll change the secondary font to a nice serif font. Your changes will be saved automatically, but you can also click the Apply changes button if you want to do that. When you're done, select Publish in the upper right corner. This is going to publish to 18 assets, every asset that's included our theme. We’re happy with that, so we’ll click Publish and return to page editor.
- Rearrange the page layout.
Now that we're back in the page editor, you can see that all of the changes we’ve made to our theme settings are applied automatically to the page that we’re working on. The next thing we want to show is how you can change the page layout using the Drag and Drop Page Editor.
The first thing we want to do is to remove this logo carousel since it doesn't really suit our company. We’re going to remove the entire section so hover over the Section with a little drop down arrow and click Delete section.
Now, we like this section but we want to move it up a little bit more on the page, so we’re going to hover over it and hold down this section and drag it up here, drop it, and it automatically changes the location, which is pretty great.
The next thing we want to do down in this “Newsletter” section is add a form. Over the Add tab in the left sidebar, find the Form module, grab it, drag it, and we could have it on the left, above, or below. We’re going to put it below so we’ll just drop it right there and it automatically appears.
You can do this with any of the modules in here. You can mess around with the layout of your page, move things around and move things up and down, remove things. You can also clone portions. If you wanted to have two of these, you can hover over it with this, click Clone and you could just very easily change the page layout with a few simple clicks.
- Add content to your page.
The next thing we want to do is to just change some of this page content. We'll go through a couple of things here, so just quickly, here’s how to edit some of the page content. If we want to edit this text, we’re just going to click here, the editor, and we can just edit it right from within the page. We’re going to change this to “Welcome to the Green Thumb”, which is our company name.
One more thing, if we want to change this image right here, we’ll click on Edit module and we’re going to replace this with an image of some of oir plants. This will pull up the file manager in HubSpot, which is where you can store all of your files, your images and so on. We've included these just so we have some content to work with, but you can also click Add image at the bottom.
There's also a Canva integration if you want to create some designs with Canva, which is pretty cool. We’re going to click this image and there's a couple of sizing options here. We want to automatically adjust the size of this image to fit the height and width of our module, but you can also choose to have the exact and height of your image as well. This is already saved, but we can click apply changes as well to see how it looks on the page.
Now that we're starting to make some real progress on this page, let’s look at how to customise a theme module. We’ll show how to customise the content in this theme module—a card section. This card section is one of the three modules that come with this particular theme.
Obviously, it has a lot of construction-type content here, and we want to change that. We’ll hover over it and click the little Edit module button. This has six cards; we don't have that many different products, so we’re going to delete the last three in this first one. We'll hover over it, click the Edit button, replace that icon with one of our own icons, and change this title.
We can change the text down here, change the link, and add a few more options, but that seems good for now. Let’s apply our changes so we can see how this affects the page. Then, let’s go back and change the other two. Depending on the module you're working with, all these options will change.
If you have a fee module for a pricing page or a pricing table, the options there will be slightly different from what's in here, but this is just to show you some examples of what you can do. All right, let’s apply our changes and see how that looks.
Next let’s take a look at how to change your navigation menu. This is part of our global header. Up here at the top, this is not our menu; this the default logo, not our logo. We’re going to change all of this, so we'll hover over that and click the Edit module button. This will give us a pop-up saying that we’re editing global content just so that you know that this is not a regular module it’s a global module. Now click Open in global content editor.
This header has a logo and navigation. Click on the primary navigation, and instead of the default menu, we’re going to choose our header nav. We already created this in our navigation settings. If you need to create a new navigation menu, you can click the Create new button, which will take you to your navigation settings.
Let’s also change our logo because this is not our logo. If it’s too big, change the width of that to, say, 50 pixels. Once we’re happy with that, in the upper right corner, we'll publish it to all the assets that this header is used on.
The last thing we’re going to show is how to change the background image on the section. This is a really common thing that people struggle with to do, struggle to do with CSS or HTML, but it's really easy to do it with the Drag and Drop Page Editor. We'll show you how to do that and work for a few minutes on some different aspects of the page.
Let’s change the background image in this section. We’re going to hover over it, and that's the Section. Click the little arrow. These are your controls. Click the Style section. We can change the spacing and also change the background. If we select Background, you can choose no background, a colour, a gradient, or an image. In our case, we have this image. We’re going to click Replace and select an image.
We’re going to keep this Resize to fill container because this is a patterned background image, and we’re not very particular about what part is shown. If you have a more detailed image and want to make sure that all of it is shown, you can select Resize to show the entire picture, but just make sure that the image dimensions fit what you need for your page.
Let’s change one more. We’ll change this one too. This is one is where it's Resize to show entire image, but since our image is not wide enough to fit the entire screen, we’re going to change this to Resize to fill container.
- Preview your page on mobile.
Let me head back into the page editor. When you are done or at least have made some progress with your page and you want to take a look at how it appears on different devices, head up into the upper right corner and click the Preview button.
This will open the device simulation, which will show you how your page is going to look on different device types. So I can look on tablet, mobile – you can see there's this nice mobile menu built in here – and this will just help you make sure that users on all different devices are having a good experience.
If you want to share the preview link, head to the upper right corner and click Copy shareable link. This will open up and you can share it with anybody, even if they're outside of your organisation or outside of your HubSpot portal.
That was just a quick overview of some of the things that you can do with the Drag and Drop Page Editor and Themes in HubSpot. There's a lot more that we didn't show, but we have some more resources where you can keep learning.
- Q&A
Q: If you have a template designed for you by a developer, is there an option to turn on the design options?
A: It depends on the template that you have designed. If it was previous to the new CMS Hub upgrade into Themes and Drag and Drop Page Editing, the developer will have to rework it to fit within this new functionality, but if you have a custom theme with templates designed for you by a developer, they can decide which design options are editable and which are not editable. Some people prefer to not have any of the options editable. They have the design exactly the way they want it and they don't want any changes or they can make it like how these pre-made themes are and have all of the design options editable. It's really gonna depend on when that theme or that template was built for you and whether it was built with theme functionality or not.
Q: Where can you customize or adjust SEO metadata for individual pages on the site?
A: If you go into the Settings tab of the individual page, you can customise the meta description and there's some advanced options in there as well. In terms of customising the SEO functionality, the different options for your entire website, if you click the Settings icon in the upper right corner of the screen, that will bring you to your settings for your entire account. There's a website option, where there's lots of different things you can change. You can customise your robot's TXT file, you can add in different code into your header or footer HTML. There's a lot of options you can do there, but it's all from either the settings of your account or the settings of the individual page or blog post. If you look up on the HubSpot Knowledge Base, how to customise whatever specific thing you're looking to customise, there will be a Knowledge Doc that can guide you step by step.
Q: Is the Barricade template available in the marketplace?
A: The Barricade template is not in the marketplace. It's included automatically in all CMS portals, so when you're creating a new page in your CMS, either developer sandbox account or if you have a CMS portal yourself, it will be listed under the HubSpot themes option. In the left sidebar, if you select HubSpot themes, you'll see all the prebuilt HubSpot themes, which includes that Barricade theme. Those are all included for free with every account.
Q: How do you check if the design options can be enabled?
A: In terms of checking if the design options can be enabled for your website, contacting support might help. It depends on who built your website for you. If you worked with a solutions partner agency, you should contact them. If you contracted out to a developer, you should contact them. It's going to depend completely on who built your website. If HubSpot built your website for you, if you were migrated, then you can definitely reach out to Support and they should be able to help you.
Q: What resources are there for developers?
A: There’s lots of resources for developers. There's a couple of links in the resources section here. The developer website is really going to be your best resource, but if you just search HubSpot Developer or HubSpot CMS Developer, that whole website has a ton of documentation. There's also the CMS for Developers certification course that you can go through, and that will go through all the step by step resources for how to create these new types of websites in HubSpot.
Q: Are Google Fonts included in CMS Hub?
A: Google fonts are actually included automatically in CMS Hub. That's one of the new cool upgrades. As you saw, we were able to add that Open Sans font – it was included by default. If you have other custom fonts like Adobe Typekit, there are resources on Knowledge Base if you search on there for the step by step on how to do that.
Q: You mentioned at the start and HubSpot have announced that there's two different levels of the CMS – there's the Professional and the Enterprise. Could you maybe just, for the community, explain why somebody might go up to the Enterprise level? What are the major differences are between the two?
A: The enterprise CMS includes some really cool features for creating server-less function. If you have a web app that you want to integrate as part of your website, you can do that with the enterprise CMS. I'm not a developer, so I don't really understand all the nuts and bolts of how that works, but I've seen it in action and it's really cool.
For instance, if you're a fitness studio and you have a registration site where you have all your listings and people can register and it updates dynamically, that's something that you would be able to do with Enterprise CMS.
The other portion of the enterprise CMS is governance and security controls, so there's heightened levels of like different controls that you can implement for who can access what content and audit logging, code alerts, Lambda functions. I'm not entirely sure how any of this works, but a lot of it is very focused on people who have larger teams and greater IT concerns.
There's a lot more resources on this in the CMS product page which I believe I've linked in the resources as well as the CMS Hub security and IT page. It breaks down why someone would want Enterprise CM. Since it is obviously a bit more expensive, it's for people who have a little bit more sophisticated needs.
Q: Themes is the biggest thing that HubSpot have introduced in the CMS in this launch. There's obviously a number of themes that come out of the box and also through the marketplace. Are HubSpot themselves going to be extending that theme collection, or are you looking for the partner community to flesh that out?
A: I think it's a little bit of both. I know that the team, they wanted to launch with a really strong core set of themes, which I believe there are six or eight and they're right now. There's definitely going to be more built by HubSpot over time, but in terms of the partner community, I mean they're like the greatest resource ever for creating much more than HubSpot can do ourselves. We’ll definitely be leaning on the partner community a lot for creating custom themes, not only for download or purchase the marketplace, but for one-on-one with clients.
- Next Steps and Resources
Here are some next steps and resources if you want to continue learning. There's a lot more than we could cover in this short time here together, but hopefully you'll want to go out and continue learning about CMS Hub.
We’ll quickly go over what we learned today about creating pages and CMS Hub:
Your theme is your source of truth when it comes to your website’s design. Themes contain a set of templates, all with the same branding. Every page in the CMS is created by using a template, and the relationship between templates and pages is one-to-many. The last thing is to always preview your changes before publishing, whether you're changing your theme settings or your global header or you're publishing a page and you want to preview on mobile. Always make sure you preview your changes before you publish something live.
Here's a few resources that you can use to continue learning:
The first is the CMS for Marketers Certification, this is a brand new certification that goes over all the tools we listed today as well as much more. There's also the Developers Certification, the User Guide, some Knowledge Base articles for getting started, and obviously the main product page for the CMS and Pricing Page are resources for more or specific questions about pricing and functionality.